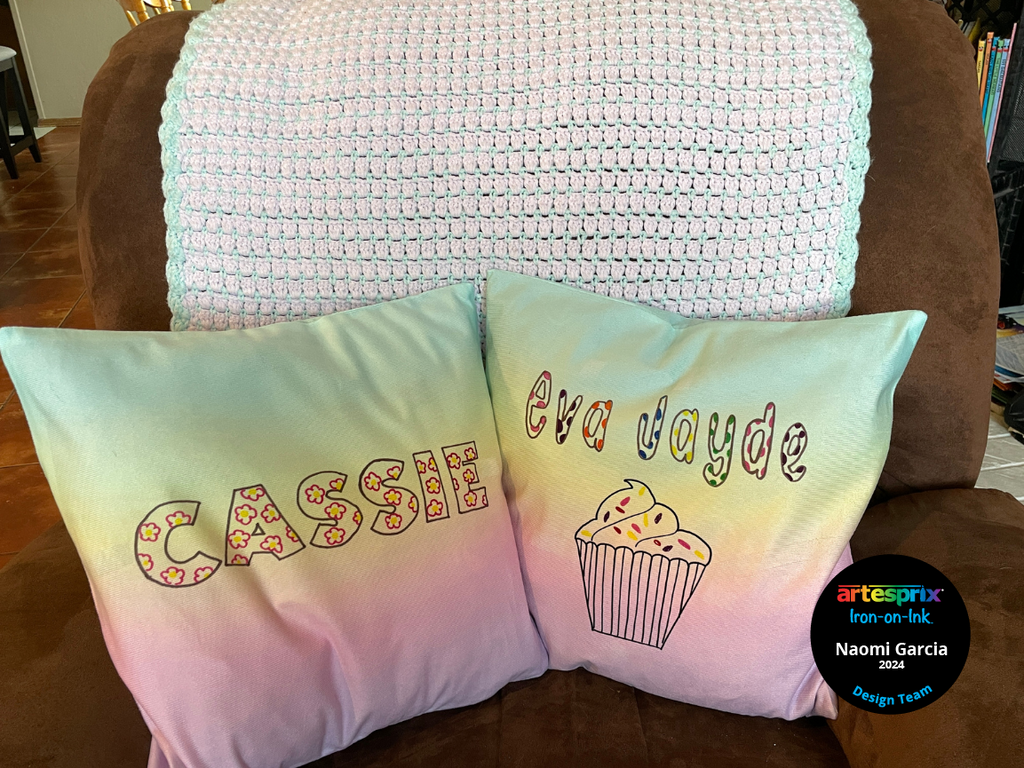
Hello crafters. I’m Artesprix Designer Naomi and I’m so excited to show you the March Blank of the Month. It’s a super cute pastel Ombre Pillow Case! Making designs for this pillow case was an extra fun process. Usually sublimation blanks are white, or "off-white", this blank is colored which adds the extra fun element. Follow along and I’ll show you how I decorated two of these pretty Ombre Pillow Cases for my daughters.
**This post may contain affiliate links. That means that I may receive compensation if you purchase through the links I have provided. The price you pay for the product or service is not higher, but I may get compensated.**
What is Artesprix Iron-on-Ink?
Artesprix Sublimation Markers, Ink, and Paint are specially formulated to allow you to use basic copy paper (something we all have) to: color, stamp, stencil, and monoprint anything you wish and turn it into a heat-transferable design. Anyone can make amazing designs, regardless of your artistic skill level. You can then use heat (either a heat press or a home iron) and pressure to apply these designs to a polyester or polyester coated substrate. Your designs will then be permanently printed onto your substrate.
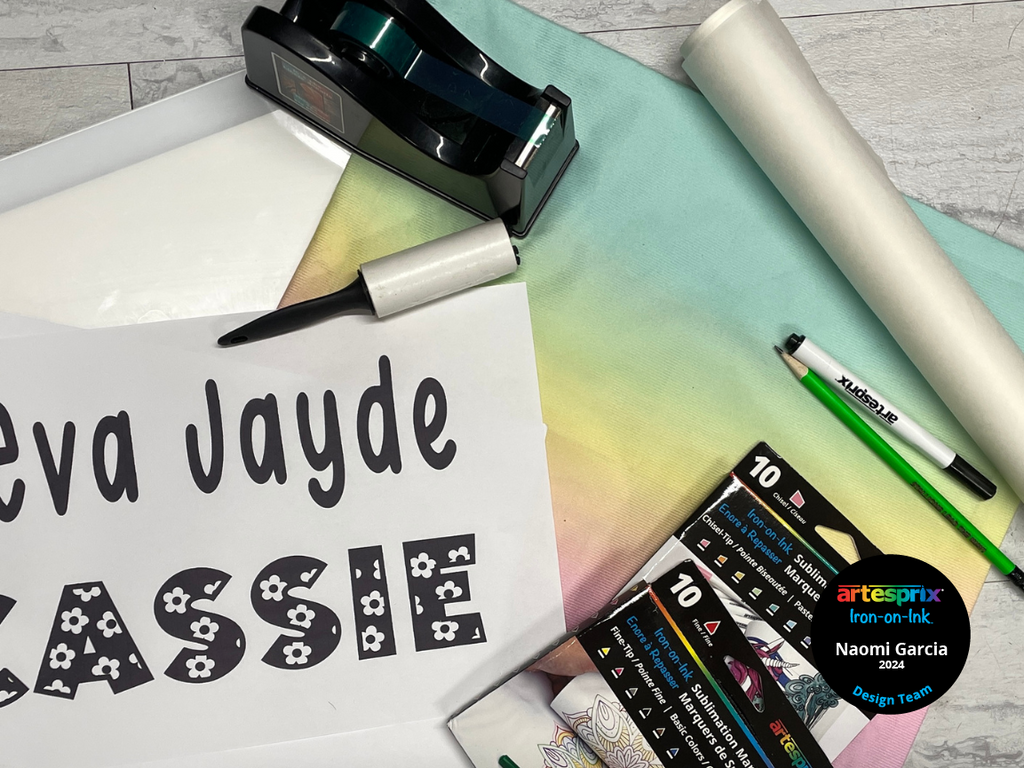
Supplies:
Sublimation Ombre Pillow Case
Artesprix Sublimation Markers
Pencil
Heat Press
Heat Tape
Copy Paper
Lint Roller
Light Pad (optional)
Printer
Step-by-Step Tutorial:
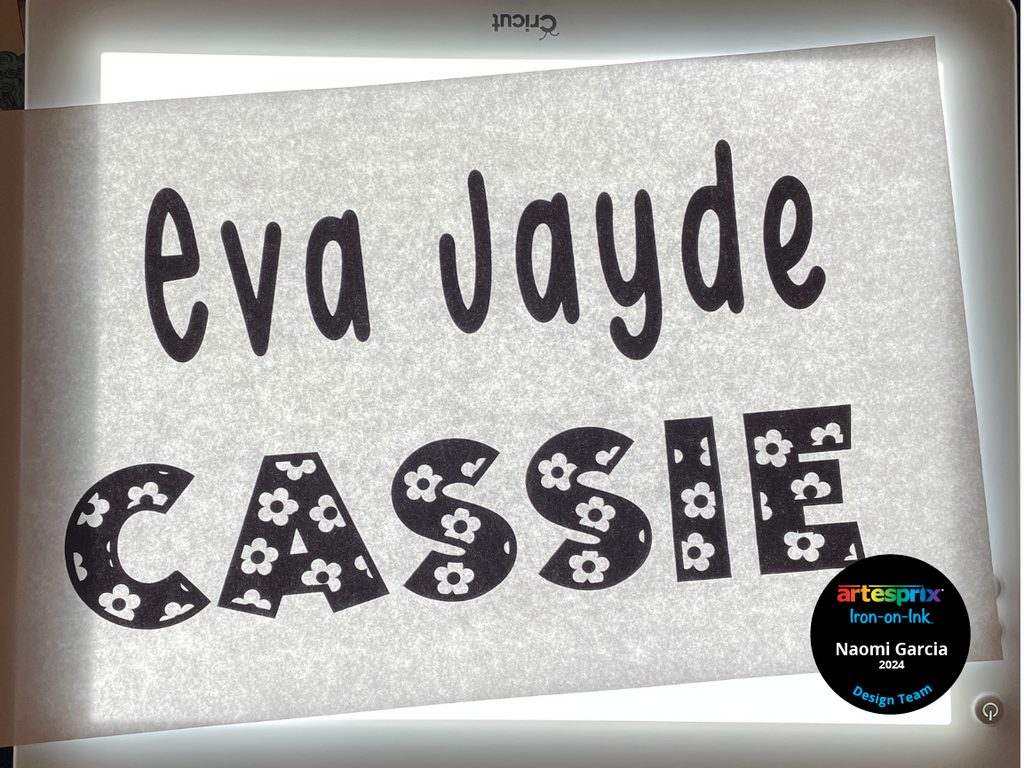
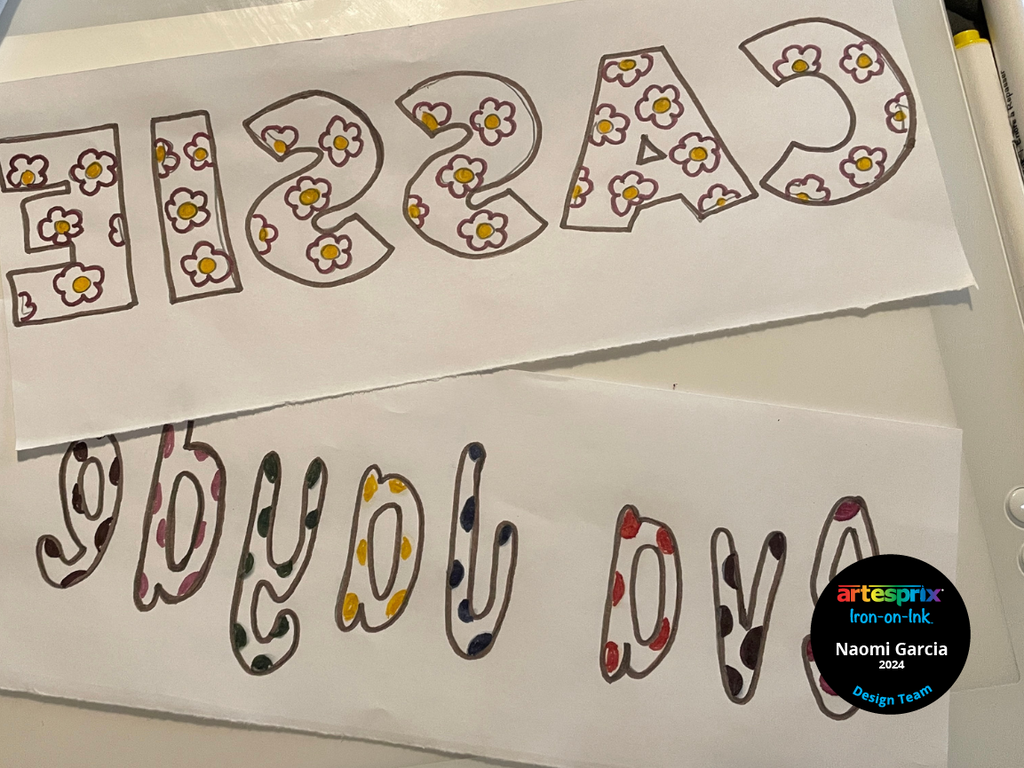
Step 1: Use any font you love to print out the name you would like onto regular copy paper. My names measured about 11” wide. The font I used for pillows are “Marker Perfect” and “Daisy”. They’re both from Blush Font Co.
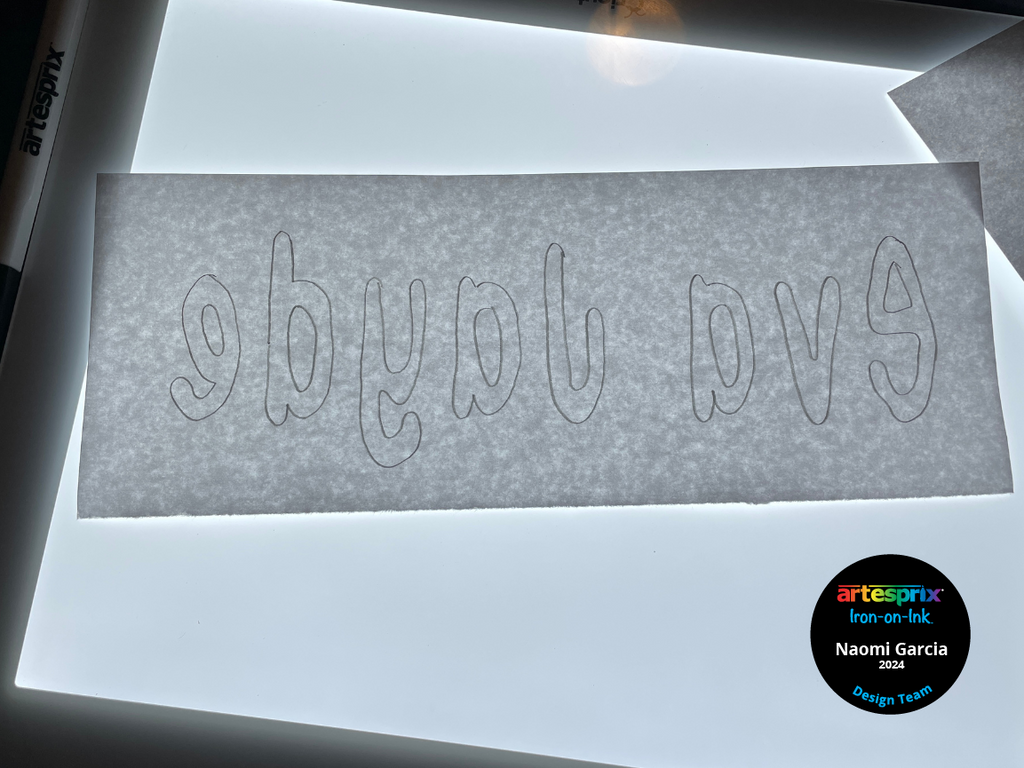
Step 2: Turn the printed name over so that it is “mirrored” and trace the outline of the name using a pencil.
Pro Tip: You can use a light pad or even a window to make it easy to see what you’re tracing.
Step 3: Trace and/or color in your name using Artesprix Sublimation Markers.
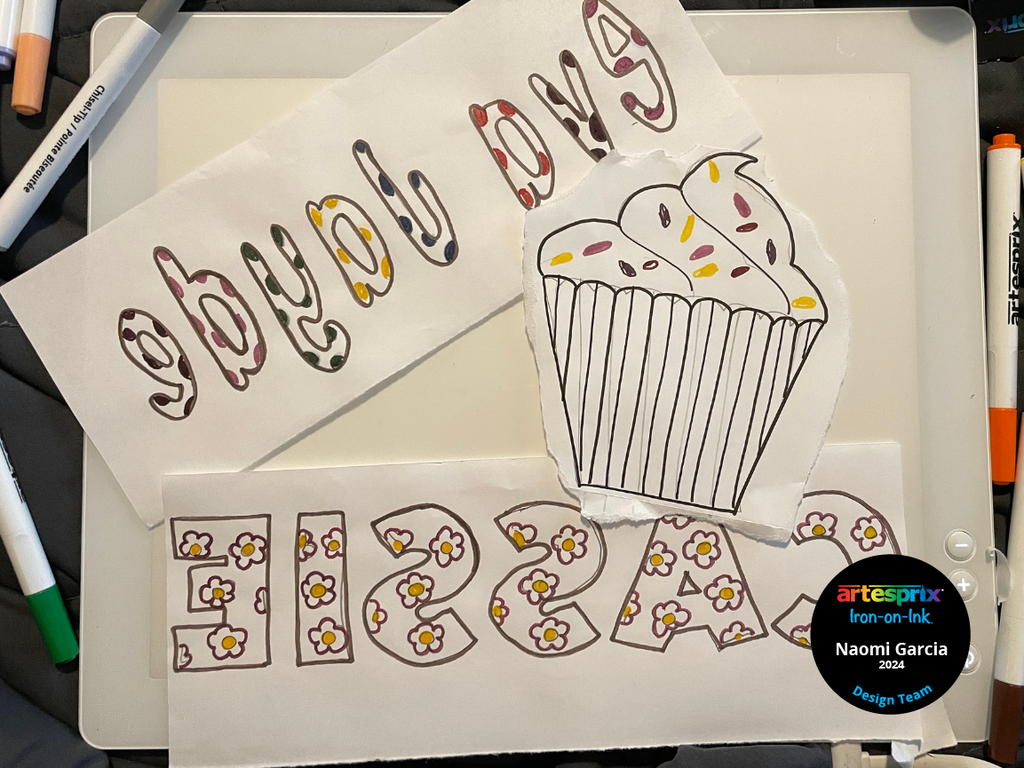
Step 4: Repeat the same tracing process for any other elements you would like to add to your pillow case.
Pro Tip: Tear around the outside of your design instead of cutting. This will help reduce harsh lines.
Pro Tip #2: Clean the ombre pillow case using a lint roller.
Pro Tip #3: Place a pressing pillow inside of the pillow case to help prevent pressing lines.
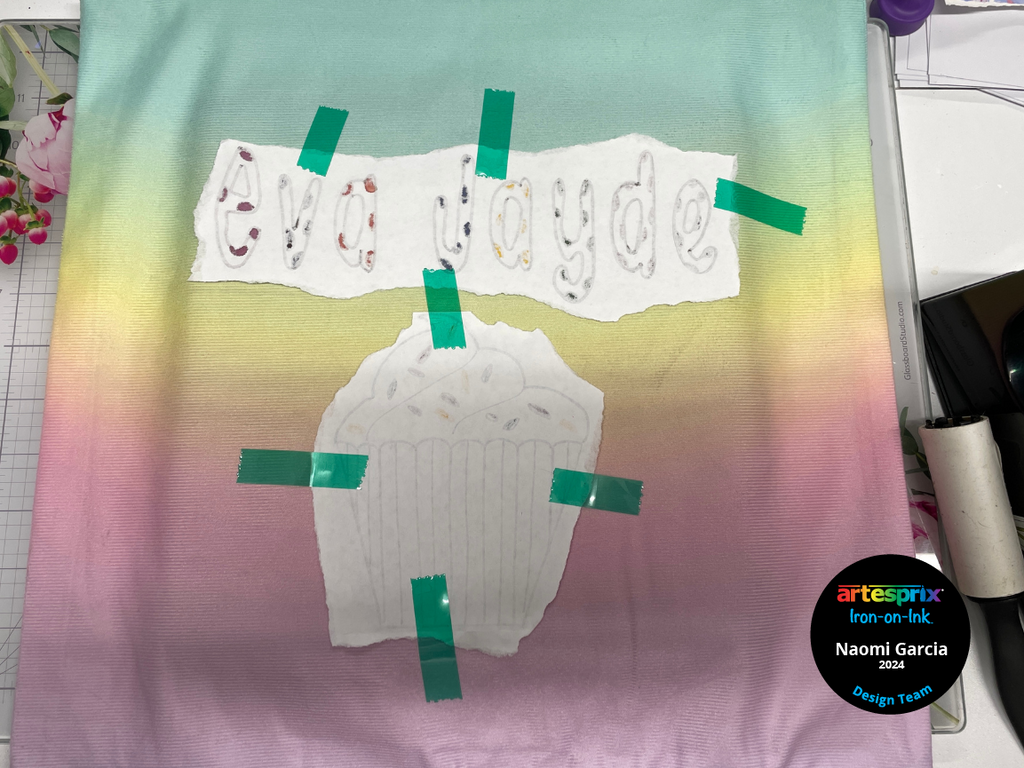
Step 5: Use heat tape to tape the designs to the pillow face down.
Step 6: Make a "sublimation sandwich" to protect your work surfaces. Put a sheet of protective paper inside of the pillow case, on top of the pressing pad. Next, add another sheet of protective paper on top of the design.
Step 7: Press your design at 385℉ for 45 seconds. Avoid heavy pressure as this blank can be prone to press lines.
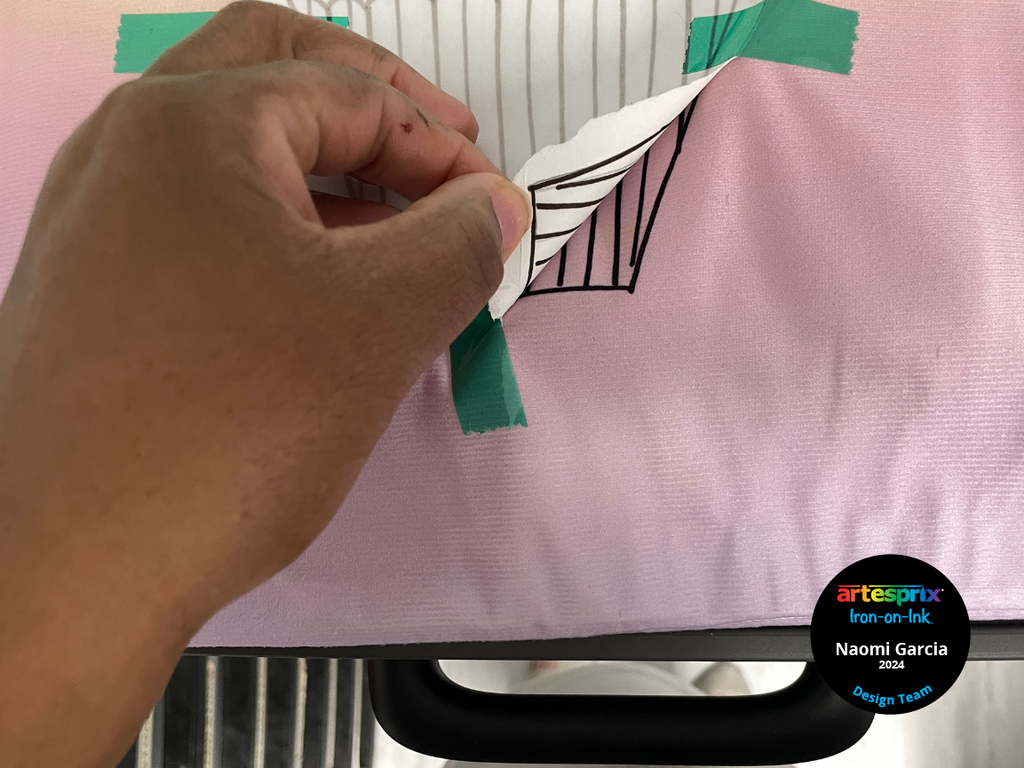
Step 8: Do a "peek test" by lifting a small corner to see if the design transferred well. If the design is transferred well, you are done and you can remove the tape and paper. If it is not, because not tape was removed, you can re-press.
Step 9: Allow blank to cool before repeating the steps above to personalize the other side. Stuff with a standard pillow insert and enjoy immediately!
These ombre pillow cases are just too adorable! My girls are headed to a spa themed sleepover party over spring break and these are just perfect. They feel so soft and the colors are perfect.
For more creative ideas for your next Iron-on-Ink project, check out the Artesprix Blog. Be sure to order your ombre pillow cases soon because they’re only here for March. Let us know if you try out this project by using the #Artesprix & #IrononInk or post your project to the Artesprix Facebook Group.
If you want to learn more about me, visit my About Me here.
Now, go make something cute!
Naomi Garcia
**This post may contain affiliate links. That means that I may receive compensation if you purchase through the links I have provided. The price you pay for the product or service is not higher, but I may get compensated.**
Comments