Hi everyone! It’s Mandie, back again with another fun idea for your next Iron-on-Ink project! If you’re a craft supply addict like me, you probably have some stamps sitting in your stash just waiting for the perfect project. When I first looked at the Sequin Pillow Blank I had about 100 ideas for it, and I had to narrow my focus. So, I pulled out these stamps that I LOVE and thought they would make some gorgeous home décor! This is my last Artesprix blog for the term and I think it is one of my best yet.

**This post may contain affiliate links. That means that I may receive compensation if you purchase through the links I have provided. The price you pay for the product or service is not higher, but I may get compensated.**
What is Sublimation Iron-on-Ink?
Iron-on-Ink is an innovative craft sublimation medium to create unique designs that you can transfer to Na endless selection of blanks. You can create some amazing one-of-a-kind gifts that will last a lifetime. When the finished sublimation design is combined with heat and pressure, the ink turns into a gas and binds to the polyester fabric or poly-coated blank leaving you with a permanent transfer. Between Artesprix's plethora of Iron-on-Ink products and the endless amount of compatible sublimation blanks, the possibilities are endless! Iron-on-Inks is fabulous because you don’t have to invest in an expensive sublimation printer to create some high quality projects right in your home! Plus, if you’re more “hands on” or “hands inky” like me, I feel you can get so much more creative with the Sublimation Inks, Paints and Markers that Artesprix offers!

Supplies:
Sequin Pillow Blank
Iron On Ink Stamp Pads
Iron On Ink Markers
-Bold Chisel Tip
-Pastel Chisel Tip
-Fine Point
Acrylic Block
Heat Tape
Protective Paper
Stamps
Heat Gun
Copy Paper
Step-by-Step Tutorial:
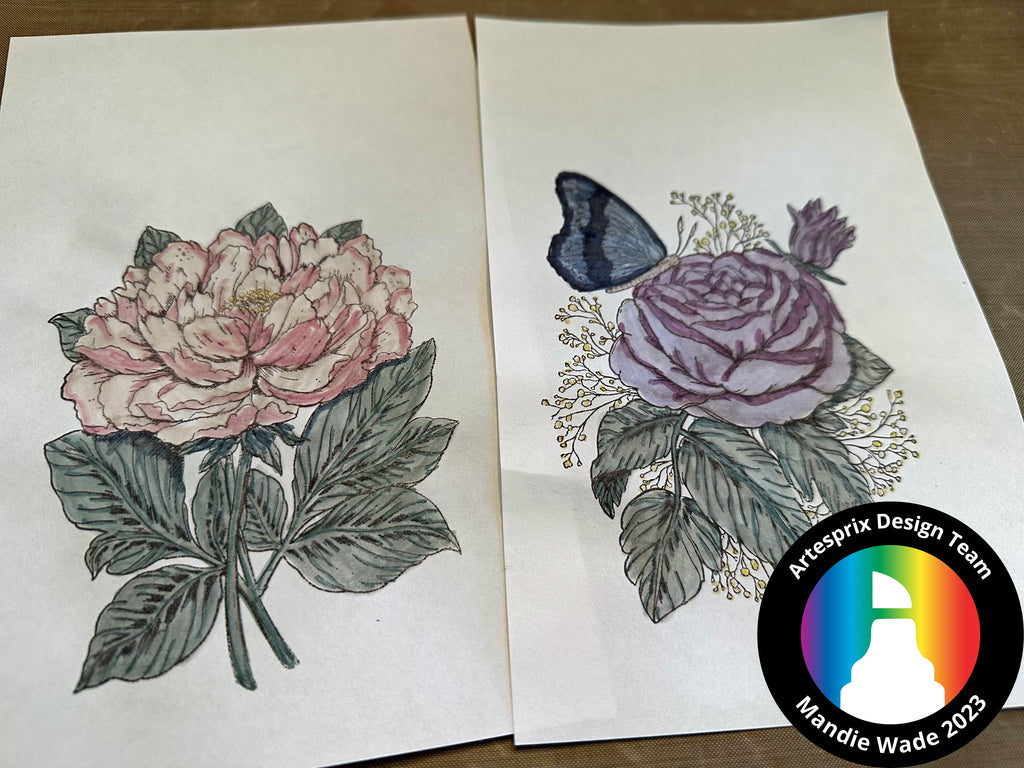
Step 1: Take your stamp and Stamp Pads and stamp your design onto plain copy paper. Because these stamps are so large, I used a stamping tool to make sure I got a nice clean image.

Step 2: I used a variety of my Artesprix Markers to color both of my floral designs.
Step 3: I used my Cricut to write out my phrase on another piece of copy paper. I used a light-colored pen in my machine and had it write mirrored so that when I transfer it to the pillow it will be in the correct direction.

Step 4: I used my markers to color and outline the words.
Step 5: I cut out the finished designs and the phrase, leaving a 1" boarder around everything so I can use plenty of heat tape around the edges to adhere it.

Pro Tip: Use a pair of tweezers to ensure all the sequins are flipped white side up before adhereing designs.
Step 6: Next I taped down my designs to my Sequin Pillow Blank and used my heat press to transfer the image. Only use Heat Tape on the outer edge of your design, not over it, as the heat resistant characteristic of the tape will affect the consistency of the transfer.
Step 7: Create your "sublimation sandwich" cutting 2 pieces of siliconized Protective Paper bigger than your design and layering your secured blank in between. Be sure the blank is positioned with the paper side on top so the heat only has to go through the paper. For this blank 400℉ for 60 seconds is the recommended temperature and time.

Step 8: It’s time for the "Peek Test"! I carefully peeled up the tape from one of the edges of my design to make sure the transfer is complete, and WOW! The colors are beautiful so I removed the papers from my blank to reveal my finished project!
Step 9: Add a standard 16" pillow (not included with Sequin Pillow Case purchase from the Artesprix Shop) and our home decor pillow is finished.
Make sure you check out the Artesprix Inspiration Facebook Group for even more great project ideas! I have loved being a part of the Artesprix Design Team for the past 6 months. I look forward to making a guest designer appearance later this year. Can’t wait to see what the new designers are making!
Stay Crafty,
Mandie Wade
**This post may contain affiliate links. That means that I may receive compensation if you purchase through the links I have provided. The price you pay for the product or service is not higher, but I may get compensated.**
Comments