Hello! I’m Alison Heikkila, and I appreciate you stopping by. Today I have an ornament to share that uses Sublimation Markers and ink from Artesprix, plus some adorable stamps from Lawn Fawn. You can use most of your stamps that are already in your collection for sublimation! The project I am sharing today should give you a ton of ideas on how to incorporate the stamps you already own into Sublimation projects. Let's get started on this Ho-Ho-Holidays Artesprix Blank of the Month Ornament!

What are Sublimation Markers?
Artesprix Sublimation Markers and Ink are specially formulated inks that allow you to use basic copy paper to: color, stamp, and stencil anything you wish and turn it into a heat-transferable design. These designs are then applied to a polyester or polyester coated substrate with heat and pressure. You can use a heat press or a home iron! These designs, through this process of sublimation, will become permanent on your substrates.

Materials:
Sublimation Stamp Pad-Black
Original Sublimation Markers
Gnomies Sublimation Markers
Pastel Sublimation Markers
Black Sublimation Markers
Metal Ornaments
Protective Paper
Heat Tape
Heat Source: Home Iron or Artesprix Heat Press.
Lawn Fawn: Ho-Ho-Holidays and Christmas Dreams Stamps
Stamping Postioner/Platform or Acrylic Block
Pencil
Copy Paper
Project Mat
Step-by-Step Tutorial:
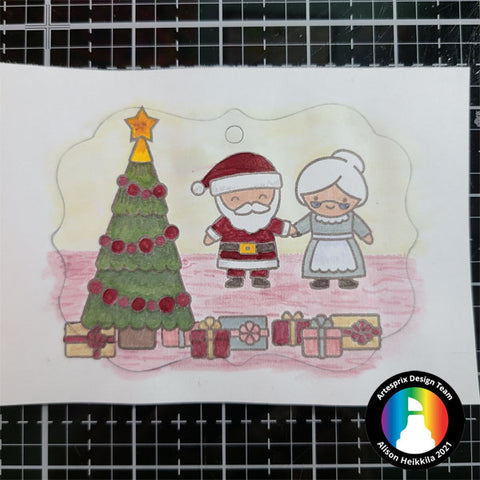
Step 1: Trace the outline of your blank on to a piece of copy paper with a pencil. The pencil will not transfer during the sublimation process. The shape of this particular blank has lots of room to design my Ho-Ho-Holidays Artesprix Blank of the Month Ornament.

Step 2: Stamp your images on to your copy paper using the Sublimation Stamp Pad and a stamp positioner or an acrylic block. For my little scene, I needed to mask off some areas (like Mrs. Claus’ hand) so that I didn’t have double images on top of each other. You can do this by cutting a mask of the stamp you want to be *on top* or, just wipe away the ink from the stamp before stamping it. If you wipe too much away, you can fill in the areas with the Fine Tip Black Marker, which is what I did.

Step 3: Color in your stamped images with Sublimation Markers. For my wall, floor, Mrs. Claus’ apron, and Santa’s fur trim, I scribbled the colors I was using on to a craft mat, and with a wet brush I painted the colors on for a softer look. Don’t worry that colors look dull. This is normal. Once you have done the sublimation, the colors on your project will be vibrant and beautiful this Ho-Ho-Holidays Artesprix Blank of the Month Ornament.
Pro Tip: Take care to color past your traced pencil line, in case your blank isn’t lined up perfectly when you do your transfer.
Step 4: Using Heat Resistant Tape, attach your colored image face down on to the Ornament Blank. This particular Ornament is double sided, so you can attach it to either side. If you are using a Heat Press, you don’t need much tape, but if you are using a home iron, be sure to use Heat Tape around the entire blank to ensure that it doesn’t move during the sublimation process.

Step 5: It’s time to make our Sublimation Sandwich. The photo may not look like much, but it is extremely important whether you are using a home iron or a Heat Press. Cut two pieces of Protective Paper that are bigger than your Blank. Lay one piece down, then your taped Blank and colored image- with the blank on the bottom- and then your second piece of Protective Paper. Your sandwich will be: Protective Paper-Blank-Colored Image-Protective Paper.

Step 6: I pressed my Ornament for 75 seconds at 400℉. If you are using a home iron, you’ll want to have it on the highest dry setting, and press for 3 minutes. Be sure to not move the iron at all while you are pressing.
Step 7: Peek Test! Before removing any tape, pull back/lift up a small portion of your design to confirm your transfer was successful.

Step 8: Look at how happy Santa and Mrs. Claus are! The colors transferred so nicely, and you can see the detail I added into the floor. This may be my favorite part of the whole process!

Step 9: You just need to add your ribbon to the top of your ornament, and then it’s ready to hang! The Metal Ornaments come with pretty red ribbon, which is perfect for my project.
Wouldn’t these ornaments make wonderful gifts?
Family….friends...teachers….you can make each one distinctly unique, depending on who you make these ornaments for, and what stamps you have on hand. How would you like to get more ideas on how to use Sublimation Markers? There’s a Facebook Group that’s just for fans of Artesprix! You can click HERE to join. Also, don't forget to visit the Artesprix store to see all of the available blanks and bundles, so you can get started with sublimation.
Thanks so much for stopping by. Have an inspiring day!
Alison
**This post may contain affiliate links. That means that I may receive compensation if you purchase through the links I have provided. The price you pay for the product or service is not higher, but I may get compensated.**
Comments