Hello! I’m Sara and I’m so excited for today’s project because we will be using the newly launched Artesprix sublimation stamp pads and ink refills! I’m so impressed with them, and I can’t wait to show you more ideas on how to use them as we go, but first let’s get going with our project!
Today, we will make a floral bottle opener using Artesprix sublimation stamp pads and ink refills. It will be a fun project! We’ll be using our gel press with our ink refills to get a watercolor effect then we’ll stamp our floral design on top!

What is Sublimation Iron-on Ink?
Iron-on ink is a special ink that gets printed onto poly-coated substrates once it is subjected to heat. Iron-on inks are always muted on paper, and they become vibrant after they’re heat pressed onto the sublimation blank.
So, we will be using our ink refill bottles to make a unique design and transfer it onto our bottle opener using our heat press. The design will be infused into the blank permanently and the sublimated design will not need to be sealed and it will not peel or fade.

Materials:
Bottle Opener Sublimation Blank
Magnet
Pencil
Step-by-Step Tutorial:
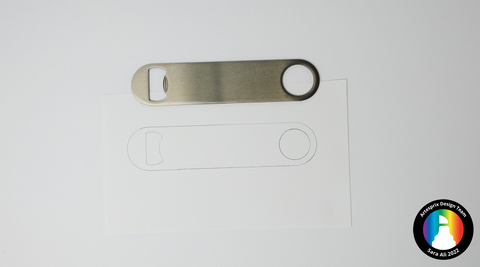
Step 1: Start by placing your bottle opener on a mixed media paper and trace it with a pencil. This will help you figure out how big your design needs to be! Using a pencil is important since it will not transfer to the blank when we heat press it!
Step 2:
Let’s create our design! Before we start, I recommend laying paper towels on your work area because we’re playing with inks today. Next, we’ll place our gel press and drizzle some isopropyl alcohol on its surface. This will cause the drops of iron-on ink to move freely. For this bottle opener, I tried going for darker color palette since it is a stainless steel blank. So, our colors are pink, purple, blue and black. I started with splattering a couple of ink drops from each bottle. Then, I started moving the inks and the alcohol on the gel press around to get them to mix beautifully! Feel free to add a few extra drops of isopropyl alcohol if needed!
After moving the inks around, I applied my mixed media paper face down onto the inks on the gel press. Once I got good coverage of my design area, I started peeling it away from the gel press. This will make a beautiful watercolor effect!

I left my colored design to air dry and I turned on my heat press so that it is ready when we’re done coloring our design. For this bottle opener, we’ll need to set our heat press to 400°F for 75 seconds. Now, we’ll finish up our design by stamping our floral pattern using our sublimation stamp pads. I applied the pads to the face of my rubber stamp and I stamped the floral design over the background we made with the iron-on ink refills.

Step 3: Place your bottle opener face down on your colored design. This blank is double sided so you could sublimate on the opposite side if you’d like, but I have a different idea! Once you place it down, you’ll need to secure it to the paper with heat resistant tape. Securing it will prevent ghosting and ensure you get a crisp design!

Step 4: Let’s make a sublimation sandwich! Use your protective paper to sandwich in your design with your bottle opener secured to it. It is very important to use protective paper because we know we colored outside the blank. So, using it will catch any extra ink and you won’t have to deal with getting ink on your heat press!

Step 5: It is time to press your design! Your heat press should be set to 400°F and you’ll need to press it for 75 seconds.

Step 6: After you press your design, it is time for the peek test! Do not remove the tape and slightly peel one corner of your design to get a peek of how good the design transferred. If you find that you got a vibrant transfer, then remove the tape and reveal your amazing design! In the slightest chance you didn’t get a good transfer, you could go ahead and re-press your design!

Step 7: Reveal your design! Look at how vibrant the colors are, I’m absolutely in love with how it came out! Now, I went ahead and added a magnet at the back to always keep my bottle opener on the fridge!
I’m in love with the new sublimation stamp pads and ink refills! I love how our project turned out! Make sure you grab this bottle opener blank this month!
I’ll also be showing you how to use your sublimation acrylic paint next blog post so stay tuned and get them now!! When you use Artesprix sublimation stamp pads in your next sublimation project, please don’t forget to share your creations with us on instagram or Facebook!
Thank you for reading! I hope you liked our project today! You can see more of my work on my instagram, let’s keep in touch!
Keep on crafting! Best,
Sara Ali
**This post may contain affiliate links. That means that I may receive compensation if you purchase through the links I have provided. The price you pay for the product or service is not higher, but I may get compensated.**
Comments