Nicole Martel on the blog with you today. I have a project for all of my kitty loving friends! You will not be able to resist this project… and by the time you see how fun this is to make, you’ll be making one, too! Come see how I created this adorable kitty Pot Holder using Artesprix’s sublimation markers!

What are Artesprix Sublimation Markers?
Magic Ink that transfers their beautiful colors from plain copy paper to a polyester product with a heat source. Iron-on-Ink Markers are the way to personalize sublimation, which is specially formulated inks that transfer only when activated with heat.

Materials:
Pot Holder
Plain Copy Paper
Dylusions Cling Mount Stamps: Puddy Cat
Step-by-Step Tutorial:
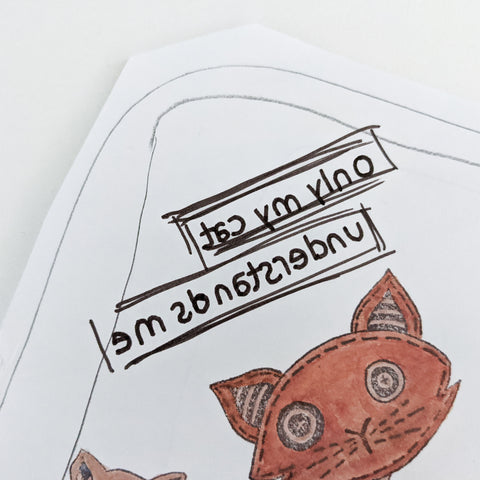
Step 1: Place the pot holder onto a piece of plain copy paper and trace the outline using a pencil to determine the area that you have to work on.

Step 2: Using a Misti stamping platform and your rubber stamps, stamp your image onto the copy paper using the Sublimation Ink Pad.

Step 3: You may need to repeat this process several times to achieve a crisp image.
Step 4: Use a fine tip black sublimation marker to fill in any missing lines. Also, notice how I used heat tape to cover a few smears. These will not transfer through the heat press since the tape is covering the mistakes.

Step 5: Color in the images using sublimation markers.

Step 6: Use a lightbox or trace mirror images of sentiment onto the paper. I used a tracing ap on my phone by taking a picture and tracing a mirror image over my phone screen.
Step 7: Using the Artesprix Heat Tape, tape your blank down to your design.

Step 8: Turn your heat press on and set the temperature to400℉ and the timer for 50 seconds.

Step 9: Create your sublimation sandwich. Cut two pieces of Protective Paper to cover your project on the top and bottom. Place it inside the Heat Press (making sure the colored image is pointing face up towards the top of the heat press). The Heat Press will beep indicating that your project is finished!

Step 10: While wearing protective gloves, lift the handle and remove your Pot Holder. Place it on the Protective Project Mat and give it about 2 minutes to cool down. Gently remove a small piece to take a peek to make sure the colors are vivid.

Step 11: Carefully, remove the protective paper to reveal your vivid design!.
If you love this, check out all of the other blanks available in the shop that you could use for these kitty stamps! Click here to shop for Artesprix's products using my affiliate link!

Thanks so much for stopping by today!
**This post may contain affiliate links. That means that I may receive compensation if you purchase through the links I have provided. The price you pay for the product or service is not higher, but I may get compensated.**
Comments