Hi and happy almost-spring! I’m Artesprix Designer Naomi and I’m back with a fun project. This time I’ll show you how I used Artesprix ink refills and the Beverage Caddy blank to create a unique gift. This blank is one of the most unique sublimation blanks that Artesprix carries. As the weather gets nicer, this is a great blank to personalize and use on your next sunset happy hour!

**This post may contain affiliate links. That means that I may receive compensation if you purchase through the links I have provided. The price you pay for the product or service is not higher, but I may get compensated.**
What is Artesprix Iron-on-Ink?
Artesprix Sublimation Markers, Ink, and Paint are specially formulated to allow you to use basic copy paper (something we all have) to: color, stamp, stencil, and monoprint anything you wish and turn it into a heat-transferable design. Anyone can make amazing designs, regardless of your artistic skill level. You can then use heat (either a heat press or a home iron) and pressure to apply these designs to a polyester or polyester coated substrate. Your designs will then be permanently printed onto your substrate.

Supplies:
Sublimation Beverage Caddy
Artesprix Sublimation Paint (Red, Blue, and White)
White school glue
Heat Press
Heat Tape
Copy Paper and/or watercolor paper
Dish pan
Water
Lint Roller
Mixing cups
Craft sticks
Step-by-Step Tutorial:
Step 1: Fill the dish pan about ½ full with room-temperature water.
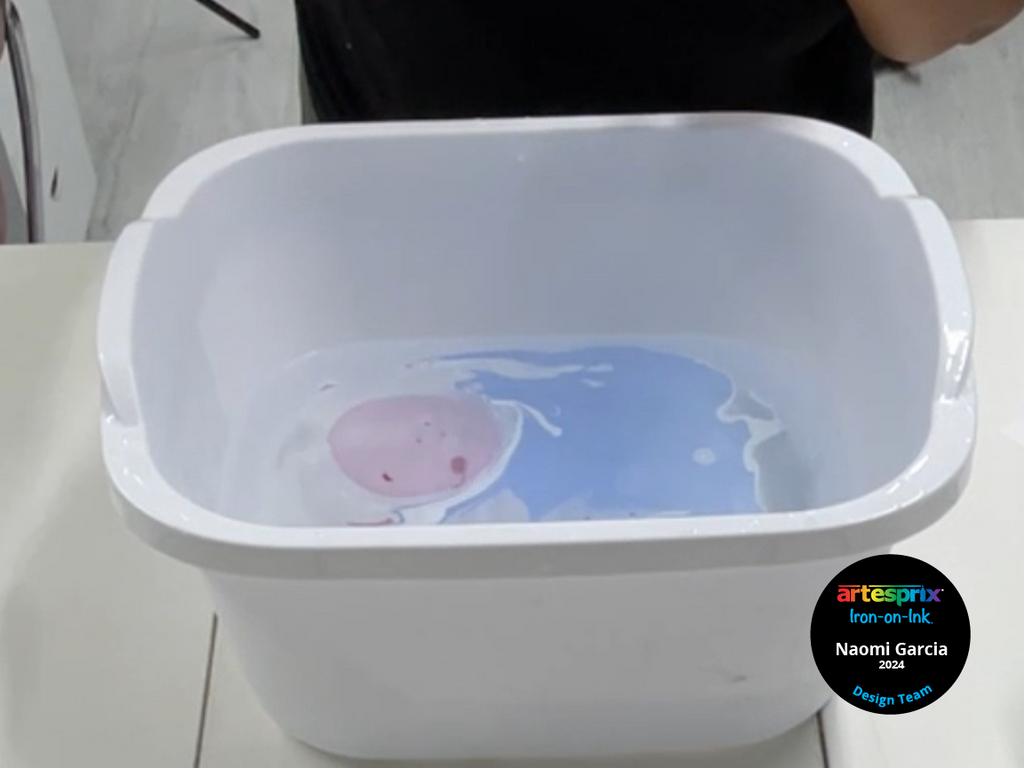
Step 2: Use 3 mixing cups and add a little bit of just one paint color to each cup (red, blue, white).

Step 3: Add a little bit of white glue to each cup and mix well.
Pro Tip: Use separate craft sticks for mixing each color.
Step 4: Use your craft sticks to drizzle some sublimation paint from each color cup onto the surface of the water.
Pro Tip #2: Watch how the colors spread and mix as you add them to the water. Add more of whatever color you want to dominate your design.

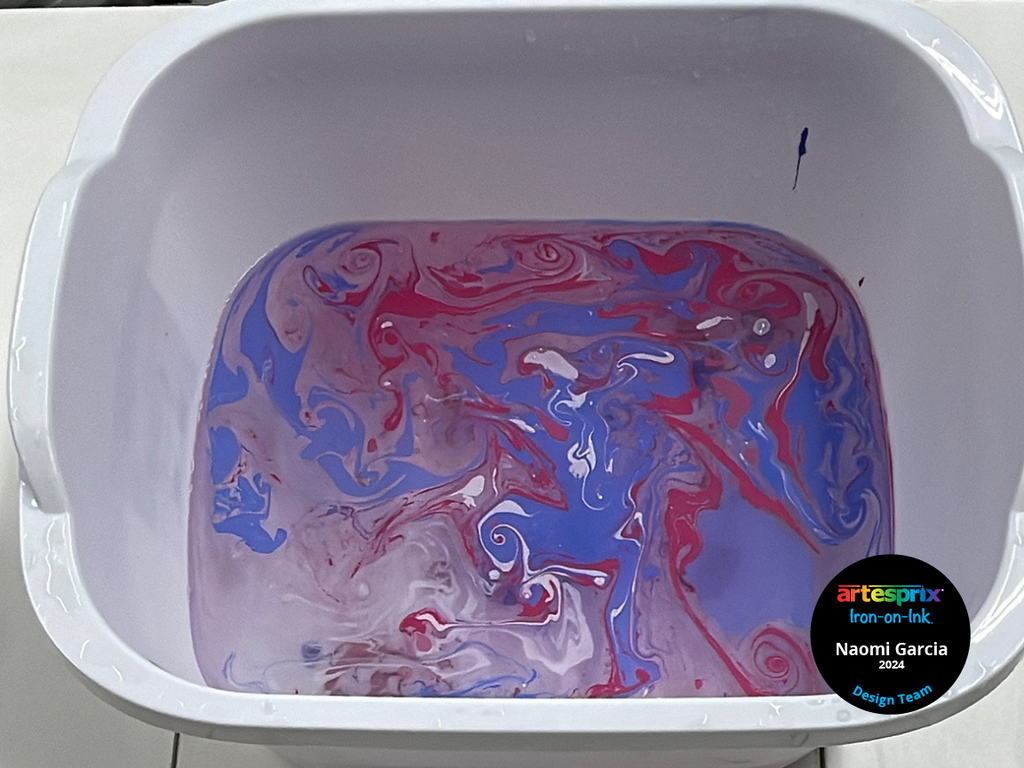
Step 5: Place a sheet of copy paper or water color paper on the surface of the water and pull up gently.
Pro Tip #3: Watercolor paper works great for this, but copy paper will work too. Be careful not to push the paper down into the water.

Step 6: Repeat the process, adding more paint to the water and dipping your paper.
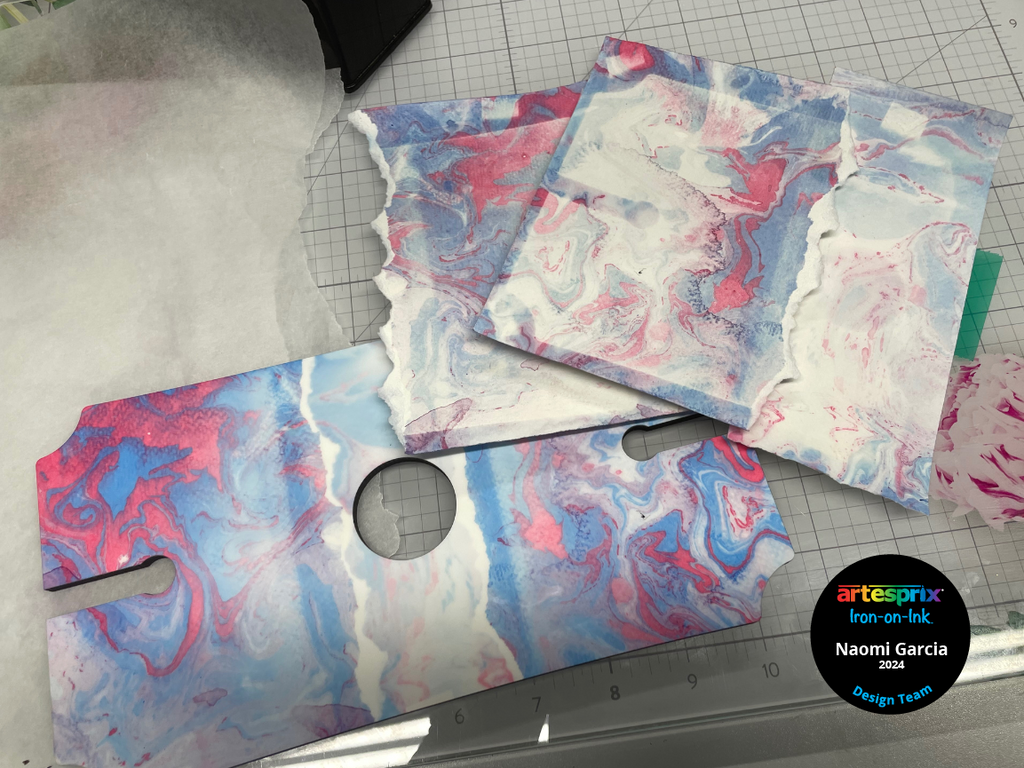
Step 7: When the papers are dry, tear them and arrange to fit on the beverage caddy as desired.
Pro Tip #4: Tearing instead of cutting will help prevent harsh lines when you transfer the design.
Step 8: Use a lint roller to clean the beverage caddy before adhering your design.
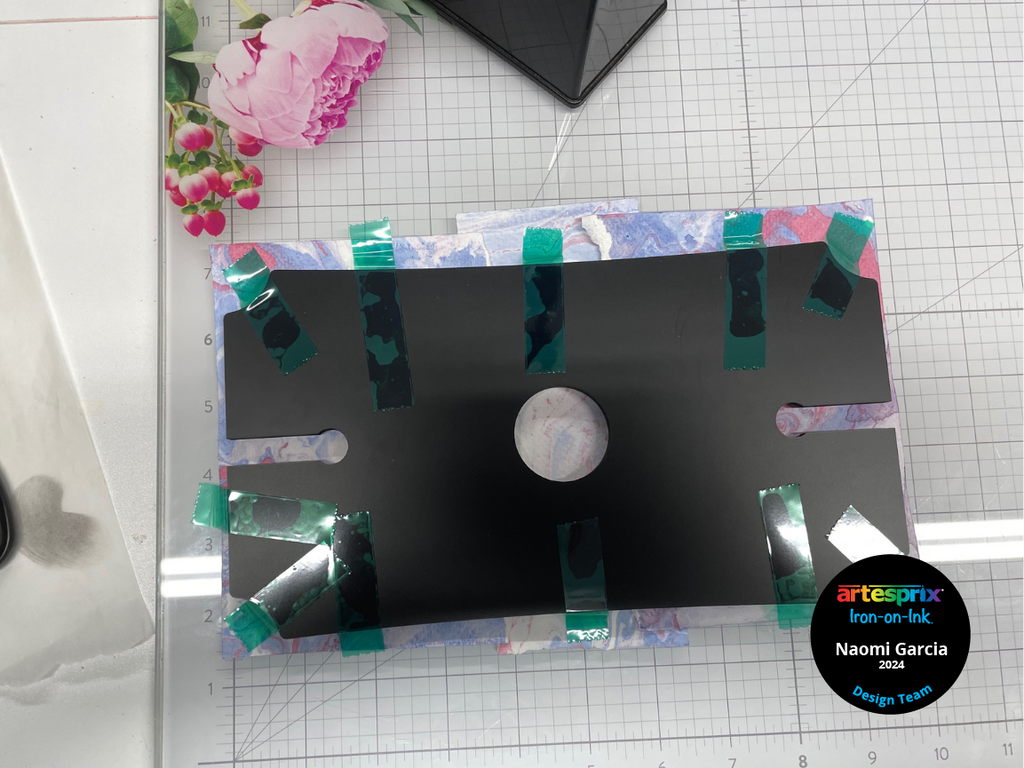
Step 9: Secure the dipped paper to the white side of the beverage caddy using heat tape.
Step 10: Make a "sublimation sandwich" to protect your heat press. Lay down a sheet of protective paper on the bottom platen of your heat press. Next, add the beverage caddy (facing up) with the painted design on top. Finally, add another sheet of protective paper.
Step 11: Press your design at 400℉ for 75 seconds.
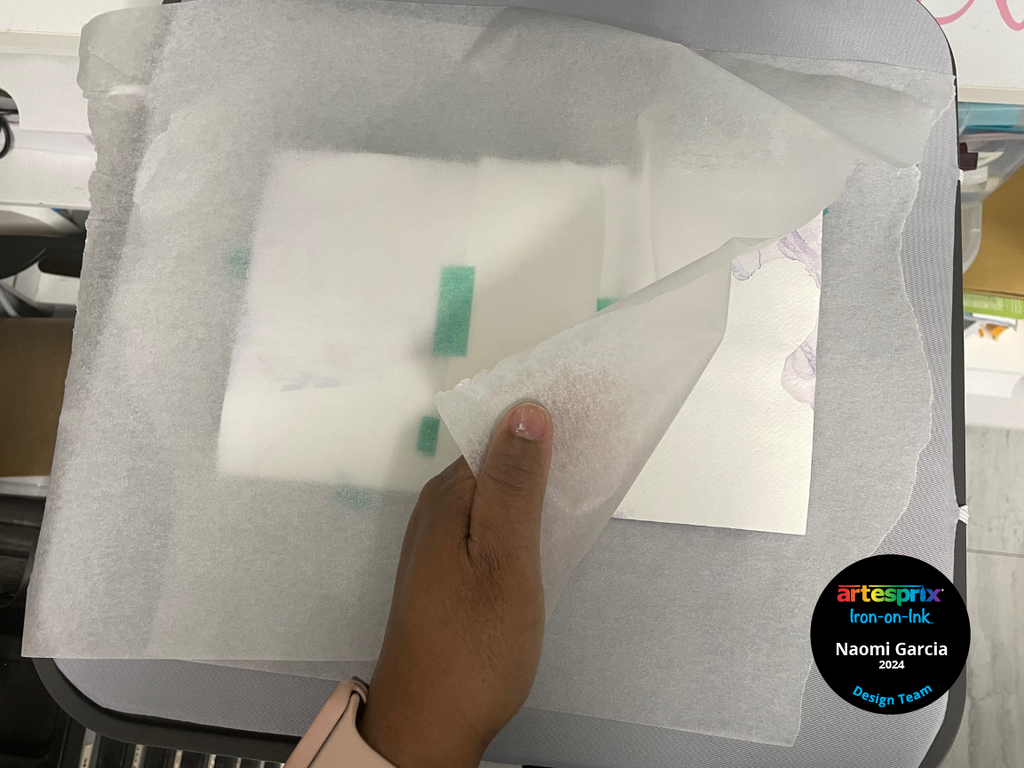
Step 12: Do a "peek test" by lifting a small corner to see if the design transferred well. If the design is transferred well, you are done and you can remove the tape and paper. If it is not, replace the covering and press again.
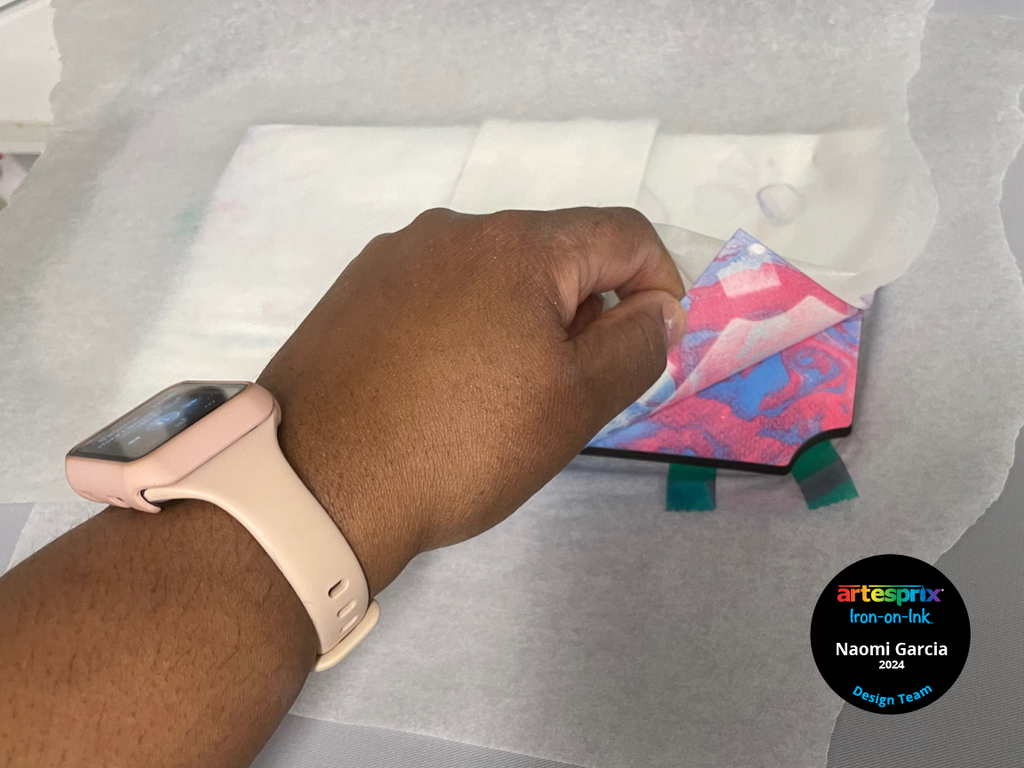
Step 13: If Step 12 if successful, remove your design/paper to reveal your transfer.
I love the look of this beverage caddy! It was so easy. And I’ll let you in on a little secret: I actually used left-over dipped paper from a previous project for this one!
For more creative ideas for your next Iron-on-Ink project, check out the Artesprix Blog. Let us know if you try out this project by using the #Artesprix & #IrononInk or post your project to the Artesprix Facebook Group.
If you want to learn more about me, visit my About Me here
Now, go make something colorful!
Naomi Garcia
**This post may contain affiliate links. That means that I may receive compensation if you purchase through the links I have provided. The price you pay for the product or service is not higher, but I may get compensated.**
Comments