Hey! Betsy here! Bringing you a fun project perfect to honor your favorite pet. I LOVE Pop-Art! The bold contrasting colors are fun to look at. I was watching a design show that was featuring Pop-Art and thought it would be fun to recreate our cats on coasters, pop-art style. The vibrancy of the Artisprix Iron-on-Ink markers would be a perfect medium to create this with. The problem is knowing coasters usually end up stacked in some type of storage container only to be taken out when needed. I didn’t want my art to be hidden, I want to display it! This led me to think, “what if the coasters were part of a work of art when not in use?"

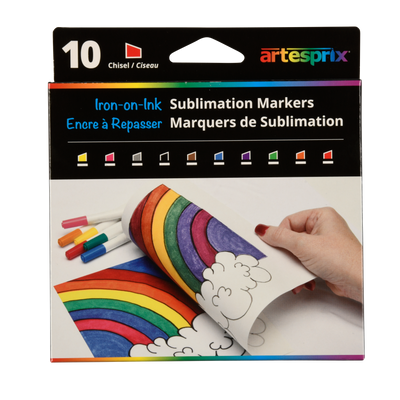
What is Artesprix Sublimation Craft Ink?
Artesprix Sublimation Inks are specially formulated heat transferred ink. These inks allow you to create personalized designs on polyester coated surfaces and polyester fabrics. Using plain copy paper, you create your design, you then transfer the finished design onto your compatible blank using a heat source and pressure. The results are vibrant, colorful, and best of all permanent! Before Artesprix you needed a fancy printer to experience this level of personalization, but not anymore!

Supplies:
Sublimation Markers
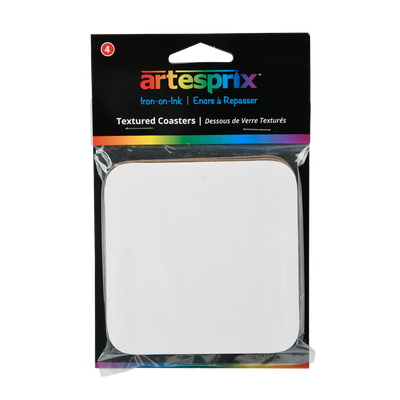
Textured Coasters
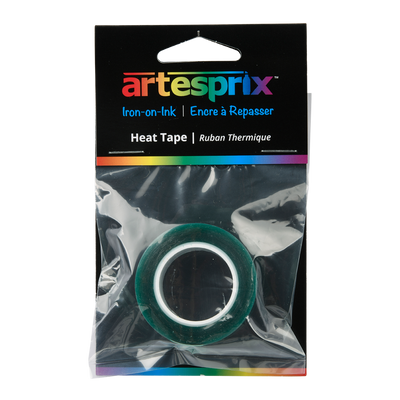
Heat Tape
Protective Paper Roll
Heat Press
Copy Paper
Pencil
8” x 8” Canvas Panel
Black Acrylic Paint (Plaid Crafts Folk-Art Multi Surface-Licorice)
Paint Brush
16-1/2” Velcro © sticky dots-black
Coloring book or sketch image generator. I used a free ap on my phone called Crayola Color Camera (Optional)
Step-by-Step Tutorial:
Step 1: Either create or obtain a small Canvas. This is what your coasters will sit on when they are not in use. I painted my 8" x 8" canvas black.

Step 2: If you are not artistically inclined, like myself, get the free Crayola Color Camera App. I took a photo of my cat and turned it into a coloring page. You have options to turn up the contrast which help me decide what I wanted to feature. You can use 4 similar photos like I did, or 4 of the same photo. Reduce the size of the photo to 3.5" x 3.5" and print on a regular printer with copy paper.

Step 3: Take a clean sheet of copy paper and with your Black Artesprix Fine Tip Sublimation Marker trace your subject. You only need to trace the areas you want to highlight. We are NOT going for an exact copy of what is printed. Keep it simple, you don’t need to trace all the details. I decided to trace /outline the head and shoulders of the cats, and then add their facial features and distinguishing marks.
Step 4: Add color! Keep your colors bright and to a minimum. I picked two colors for each cat replacing their typical black and white. I decided to color each cat’s eyes their normal eye color only a brighter version.

Step 5: Once you're finished designing, secure your coaster face down to your design with heat tape.

Step 6: After your coasters are secured, flip them over so the paper part is on top. Place a layer of protective paper under your coaster and on top to protect your heat source.

Step 7: You are ready to transfer. These square coasters from Artesprix call for 400℉ for 90 seconds.
Step 8: After the full 90 seconds have transpired, carefully do a "peek test". Lift up part of the paper without removing the tape to ensure the transfer was successful.
Step 9: Once you confirmed your transfer is vibrant, remove the paper. Allow everything to cool.

Step 10: Apply the “fuzzy” or loop side of your Velcro© to the back four corners of the coasters. Apply the hook “prickly” part of the Velcro© to your canvas.
Pro Tip: To have your Velcro© line up perfectly on your coasters. After adhering the loop side dots to your coaster, adhere the dots together. This way there is an exposed sticky side, then press your coaster to your canvas.

It’s time to admire your project! Check out those vibrant colors! You can add a hanger to the back of the canvas to hang on the wall or use an easel to display your canvas on a coffee table or side table. When needed, simply pull off a coaster from the canvas and then replace it when finished. You could also apply magnets and put them on your refrigerator!
I love how this project solves a problem and then, while not in use, provides a bit of fun artwork to honor the felines in our household. I hope you try some “pop-art” coasters. We would love to see your work when finished. Come join us in the Artesprix Facebook Group to show off all of your sublimation artwork or find inspiration to begin your next creation!
Until next time, stay crafty!
Betsy Burnett
Comments