Hello everyone!! Christmas is coming and I haven't even started shopping yet. I do this every year... put shopping off until the last minute. Don't ask why. It's not like I don't know what day it is each year...LOL. Any way, I can tell you that I have been working on a few fun holiday projects like this Artesprix Maple Bag Tag!
Lets get started so I can teach you how to create this fun Holiday Maple Bag Tag project...

What are Artesprix Sublimation Markers?
If you like crafting, you’re going to love Artesprix Sublimation Markers! These markers allow you to transfer drawings from regular paper onto other surfaces such as key chains, bags, fabrics and much more. If you’re transferring a design directly to fabric, you’ll just want to be sure that it’s polyester (however, there ARE ways around that).
To Create this Bag Tag, you will need the following:
Gnomie Botanical and Original Sublimation Markers
Heat Press or Regular Iron (also can be used for this project)
Trinity Stamp's Holiday Tweets Stamp, Elephant Gift Stamp
Step by Step Instructions:
Step 1. To begin, I used the Maple Bag Tag as a template to trace on white regular copy paper using a pencil. Pencil does not transfer. Only the Iron-on-Ink in the markers transfer to the polyester blank during the sublimation process.

Step 2. Next, I stamped Trinity Stamp's Holiday Tweets image onto the plain piece of paper using the Sublimation Ink pad, my Stamps, and the acyclic block.
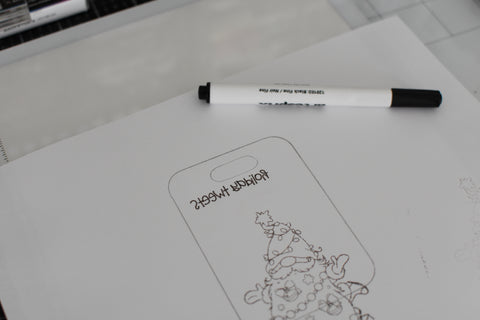

Step 3. I colored the images using the Original Marker Pack and the Gnomie Botanical Sublimation Marker Pack. For the sentiment text, I used a Lightbox to trace the sentiment backwards.

Step 4. Next, tape the blank image facing up using the heat tape. As you can see, I am using both sides of this tag!

Step 5. Set your heat press to 400 degrees Fahrenheit and timer for 45 seconds. Make sure you place your project face down to your blank on the top of your Artesprix Sublimation Sandwich before placing in your Heat Press. After your timer has completed, make sure to let your project cool down before touching it.

Here is the finished product. Wow! I just love how it turned out!
Don't forget to check out the variety of blanks on their official Artesprix website. www.Artesprix.com There are many different things you can create by hand using the Sublimation Markers, Ink, and Stamps along with our blanks! Click here to see all of Artesprix's products!
If you would like to see another fun holiday Iron-on-Ink blog, be sure to check out this Label and Place Artesprix Thanksgiving Project.
Thank you for visiting today!

Great project Nicole! That heat tape holder is so fun. I had to look twice to realize what it was. Cute!